


What is a safety razor?
Structurally, safety razors can be divided into one-piece, two-piece and three-piece designs. The number of pieces generally refers to the number of different parts that the shaver can be split into. One-piece razors are also known as butterfly-opening safety razors. You open the razor from the top, insert the blade, and close the top cover. The advantage of an all-in-one shaver is that there are no missing parts, but the corresponding disadvantage is that it may break if not properly maintained.

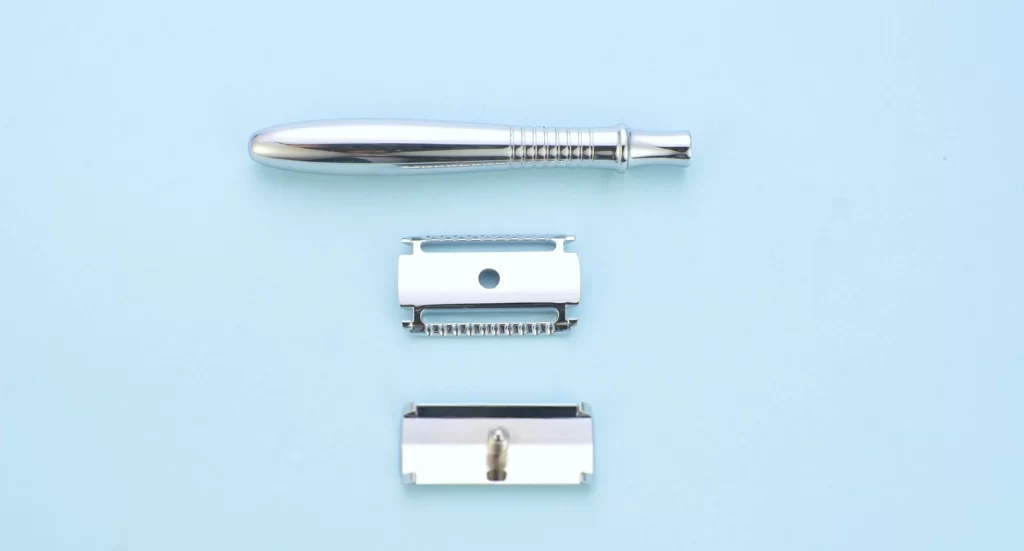
A two-piece razor consists of a razor body and a top cover. Place the blade on the top cover and screw it into the blade.
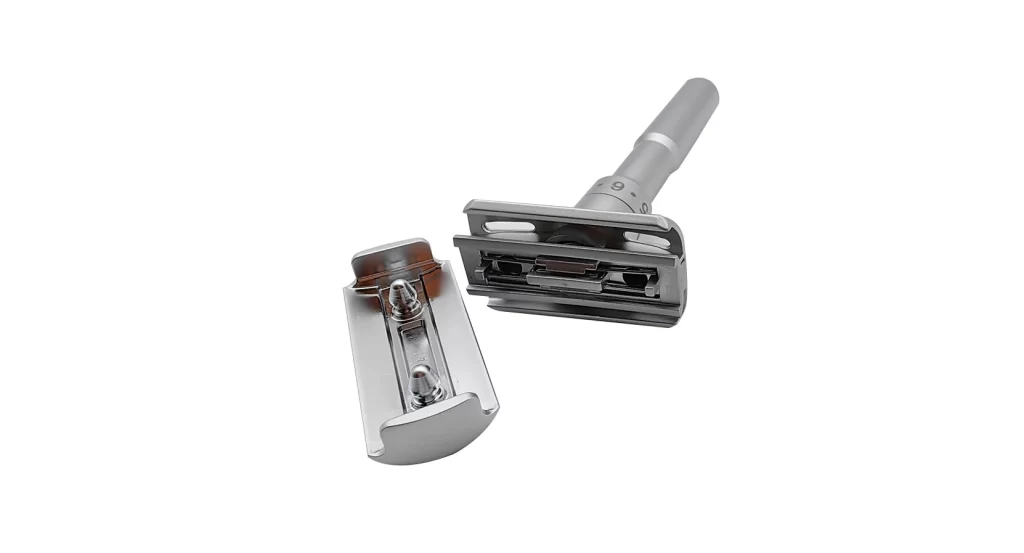
The three-piece razor is similar to the previous two-piece, but the main body of the blade is divided into a bottom cover and a handle. When installing the blade, first place the blade on the top cover, cover the bottom cover, and then screw on the handle.
When shaving with a safety razor, you should embrace a wet shave. For those who have some experience with wet shaving, the benefits of wet shaving are self-evident. Traditional wet shaving provides a shaving effect that is as close to the facial skin as possible, bringing a smoother and cleaner after-shave experience; at the same time, it can reduce the side effects of shaving such as ingrown hairs to a certain extent.
Many men find their skin to be sensitive and experience a stinging, burning sensation and other uncomfortable sensations after shaving, but this may just depend on the razor and other products they use. Most of the negative effects of shaving are due to insufficient lubrication of the skin, often caused by “cheap modern” shaving products. If you have some free time, taking the time to wet shave will be kinder to your skin and will reduce most post-shave discomfort.
When shaving wet, you need a safety razor, a blade, a shaver, a shaving brush, and shaving soap.
What is a shaving bowl?
The shaving bowl is used to dispense shaving soap or cream, which can form rich lather in the bowl. Typical shaving bowls are made of ceramic, plastic, metal or solid wood. Each has its pros and cons.
Ceramic bowls look good and can maintain more heat to keep the shaving lather warm. They are easy to clean, but they are easily broken and the smooth surface will make lathering last longer;
A significant feature of plastic bowls is that they are cheap and very durable, but the disadvantages are the same as ceramic bowls. The smooth walls of the bowl will make foaming take longer;
Metal bowls can be regarded as an upgraded version of plastic bowls. They are medium-priced and durable, but the heat conduction efficiency is very high and does not retain heat;
Finally, there is the wooden bowl, which looks much more luxurious than the previous ones. The rough texture is more conducive to foaming and is very durable. The disadvantages are also obvious. Wood absorbs water easily and will deform after long-term use.
So you can choose the right shaving bowl according to your needs.
- Observe the face and touch the beard with your hands before shaving to determine the direction of beard growth. Shaving along the direction of the beard allows the blade to contact the beard first, reducing the time the blade contacts the skin; shaving against the direction of the beard on the one hand brings very smooth post-shave skin, but on the other hand directly cuts off the hair follicles, which may cause Risk of ingrown hairs. If you choose a smooth shave, you can shave multiple times to get a clean shave. Of course, which direction to choose depends entirely on personal preference.
- Soften beard: The best way to soften your beard is to take a hot shower. If you don’t have time to take a shower, wet your face several times with warm water and apply a hot towel to your face and neck for a while. Avoid using hot water to wet your face as this will directly remove oil from your face.
- Soak the shaving brush: When preparing to soften your beard, use warm water to soak the shaving brush; however, it is best not to use hot water, which will cause the shaving brush to expand and may soften the glue that holds the bristles in place.
- Apply pre-shave lotion: Use pre-shave oil or pre-shave lotion to further soften your beard and moisturize it. After applying, rinse with a little water to remove excess oil slightly, but not completely.
- Apply shaving foam: Use a shaving brush to apply shaving foam on your face. Use quick circular motions to cover the entire shaving area, and pull your beard upright. The neck is more prone to ingrown hairs. So it’s important to spend a little time (say 2-3 minutes) on your neck to exfoliate. Spending more time before shaving will bring you an unparalleled shaving experience and a pleasant after-shave feeling.
- Start shaving: Before each shave, use your other hand to pull the skin taut to reduce wrinkles on the surface and expose more hair. It is best not to exceed 50mm for each shaving stroke, and do not apply too much pressure to the skin. Excessive pressure may cut the skin. Every time you shave, it is best to maintain a consistent tilt angle of 45-50 degrees on the face. The first time you shave, you must follow the direction of beard growth. If you feel your beard is pulling at the first time, please replace the blade immediately. Generally, a good blade can withstand 4-6 close shaves. Shaving should be done slowly to avoid no foam covering your face. If there is really no foam on your face, use a shaving brush to apply shaving foam. Rinse the blade with warm water every 5-6 shaves. After shaving for the first time, wash your face and stroke it. If it feels smooth and comfortable, then OK. If it still feels tactile, repeat the above steps for a second shave. The direction chosen for the second time can be either forward or reverse, but the reverse shave depends on the individual’s acceptance of stimulation.
- Wash: Wash your face with cold or even ice water, and pat dry with a clean towel, but it is not recommended to dry it because it will take away the oil from the face.
- Apply aftershave: Apply your favorite aftershave to moisturize and disinfect the face.
- Cleaning: Please clean all used items, especially shaving brushes and razors, and store them in a dry and ventilated place.
Shaving with a safety razor may take longer than using a disposable razor, especially if you are new to it. Be patient and take your time to avoid cuts and nicks. Remember that safety razor shaving is not just about hair removal; it’s a grooming ritual that many find enjoyable and relaxing.