


Nowadays, wet shaving is becoming more and more popular. While enjoying life, people will also focus on beauty care. In the topics of men’s care and women’s hair removal, it is worth knowing how to get a razor blade out when using a manual razor. Those new to wet shaving, are not familiar with how to change the blade in a safety razor. Find out how to change and removal the blade in a double edge safety razor, butterfly opening safety razor in this blog.
How to change and removal razor blades in a maquinilla de afeitar de doble filo
Step 1: Unscrew the Handle from the Top Cap
The first step in is to unscrew the handle from the top cap of the safety razor. Hold the razor firmly by the handle and twist counterclockwise. This action will loosen the handle and separate it from the razor head.
Step 2: Separate the Top Cap from the Base Plate
Once the handle is removed, you will see that the razor head is made up of two main parts: the top cap and the base plate. Carefully separate these two components. The top cap is typically the part with the posts that hold the blade in place, while the base plate has the safety bar.
Step 3: Get the Old Blade Out
Now, you’ll need to remove the old blade from the top cap. Always hold the blade by its ends to avoid contact with the sharp edges. This is a crucial safety measure to prevent accidental cuts. If the blade is stuck, you can gently tap the razor on a soft surface or use a paper towel for better grip.
Step 4: Dispose of the Old Blade Safely
Disposing of used razor blades properly is important for safety and environmental reasons. Use a blade bank, which is a small container specifically designed for safely storing used blades until they can be disposed of properly.
Step 5: Add the New Blade to the Top Cap
Take a new, clean blade and place it onto the posts of the top cap. Ensure the blade sits evenly and aligns with the cap’s edges. The blades are often thin and sharp, so handle them with care to avoid bending or dulling the edge.
Step 6: Reassemble the Razor
With the new blade in place, align the base plate over the top cap. The safety bar should face the same direction as the blade’s sharp edge. Once aligned, hold the top cap and base plate together and screw the handle back onto the razor head. Twist the handle clockwise until it is securely tightened, ensuring that all parts are firmly in place and the blade is aligned correctly.
How to change and removal razor blades in a butterfly opening safety razor
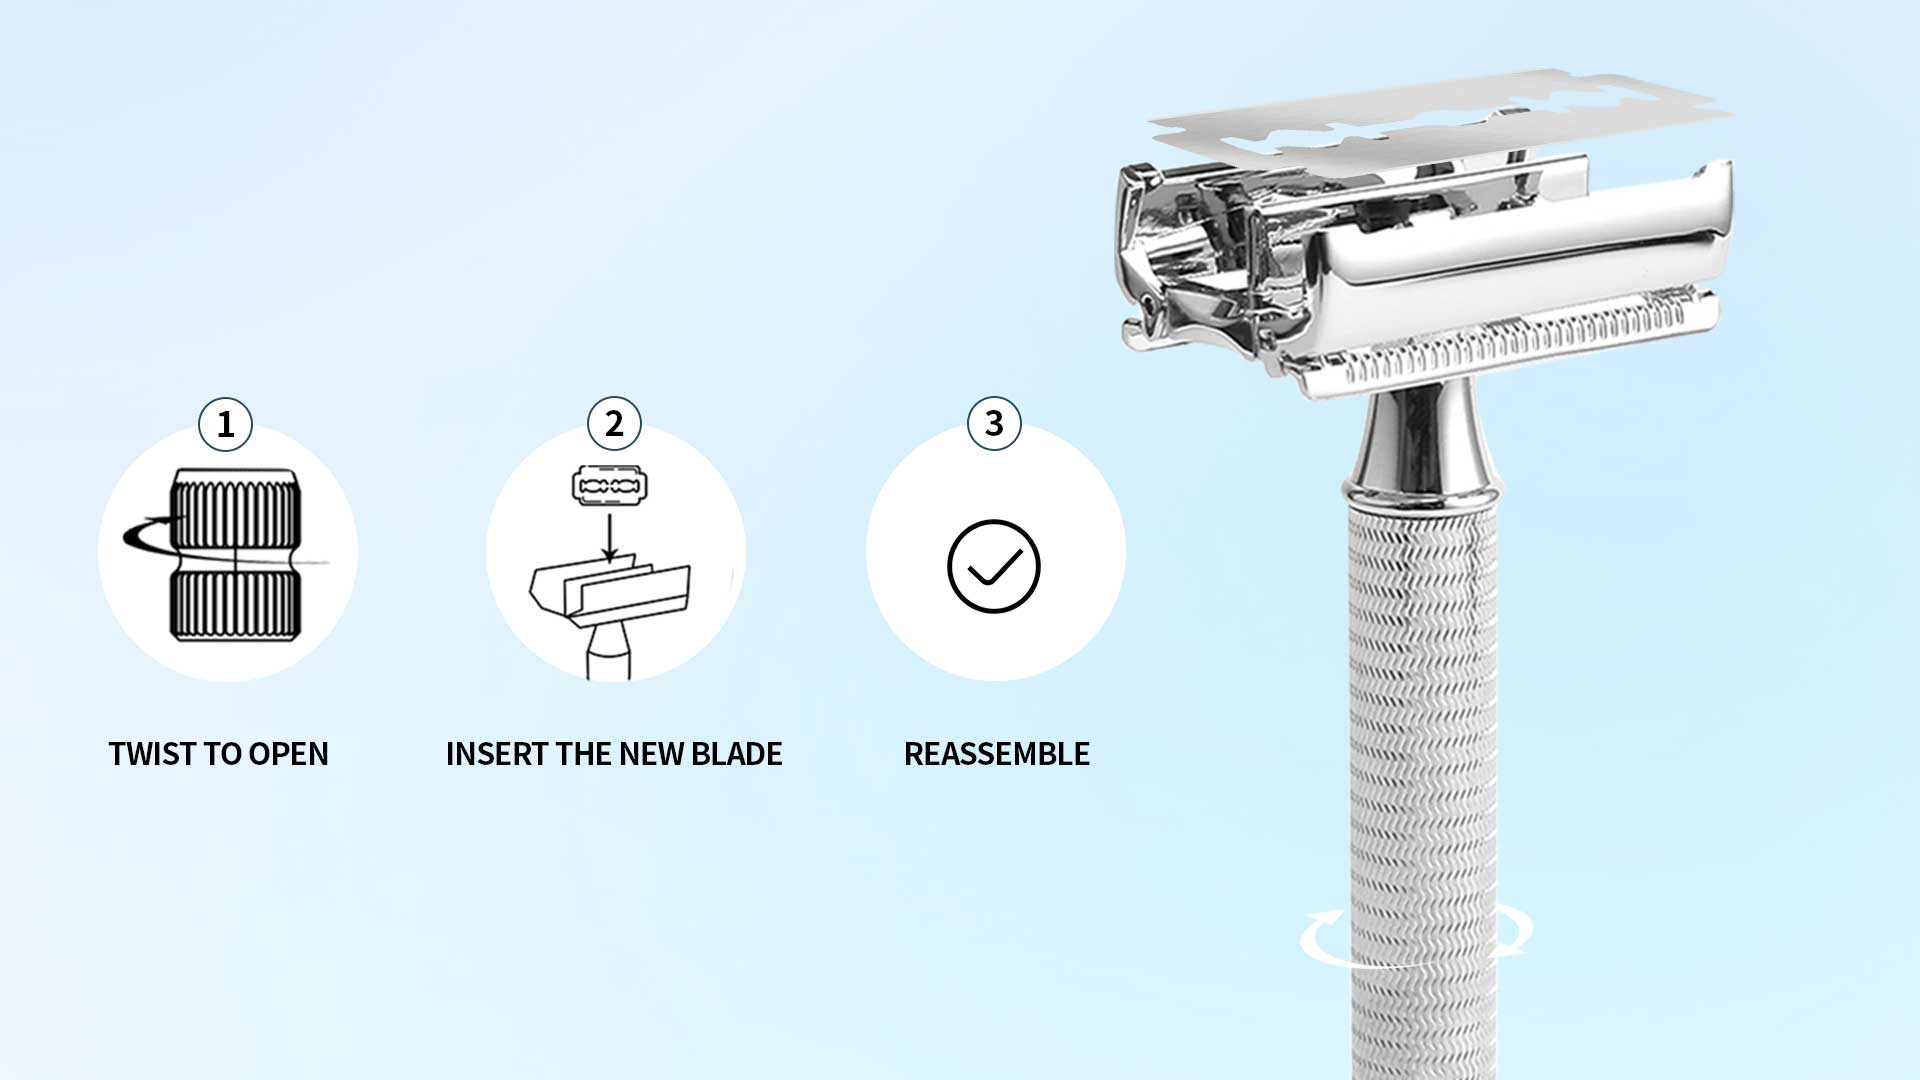
Step 1: Open the Butterfly Doors
To begin, you need to open the butterfly doors of the razor. This is done by twisting the handle or the base of the razor. As you twist, the top of the razor will open up, revealing the blade inside.
Step 2: Remove the Old Blade
Once the butterfly doors are fully open, you can see the old blade resting in the razor head. Carefully remove the blade by holding it at the ends, avoiding the sharp edges to prevent cuts. If the blade is difficult to grasp, you can use a tissue or a small piece of paper for better grip. Removing the blade with caution ensures your safety and prepares the razor for the new blade.
Step 3: Dispose of the Old Blade Safely
Step 4: Insert a New Blade
With the old blade removed, it’s time to insert a new, clean blade into the razor. Hold the new blade by the ends and place it carefully into the head of the razor. Ensure that the blade sits flat and is properly aligned with the razor head. The precise alignment is essential for an even and safe shaving experience.
Step 5: Close the Butterfly Doors
After placing the new blade, close the butterfly doors by twisting the handle or the base of the razor in the opposite direction you used to open it. Twist until the doors are fully closed and the blade is securely held in place.
Always prioritize safety and never rush when dealing with sharp objects like razor blades. With the knowledge of change and removal techniques, you’ll be better prepared to tackle any situation involving a different kinds of razor.